Last week I asked for new hobby suggestions on our Facebook page, and luckily, no one suggested jumping off a bridge. Thanks guys, I appreciate that. Our fantastic Facebook friend Jessica suggested that I try small space gourmet organic gardening. Unfortunately, it was too late into the summer for me to try to start a new garden for this article, but I did find a good resource for container and window sill gardening for those of you that’d like to try it. Since I had already started a garden of my own at the beginning of the summer, I decided I’d stick with a variation on Jessica’s organic vegetable idea, and can the fruits of my labor.
Don’t worry, you don’t need a garden to give this one a try either. Just pick up some fresh veggies from a local farmers market and preserve them for your enjoyment throughout the fall and winter. To get started, you’ll need obviously need jars, which you can pick up at a hardware store. Many of the big box stores carry them this time of the year too, and they should come with lids and rings to seal up the jars. You’ll also need a jar lifter, a big pot, some sort of collander or straining device for said pot, a big bowl of ice water and a water bath canner.
The extent of the cookware at my place is one little pot used for mediocre spaghetti, so I ventured over to my parents’ with my harvest of tomatoes, banana peppers and jalapeños to embark on my canning adventure. Since my dad was the one that helped us plant the garden in the first place, he was eager to get the canning process started, and enlisted the help of my brother and husband as well. I guess a more accurate description would be my dad quickly took over as foreman of the canning factory assembly line, barking out directives to his workers.
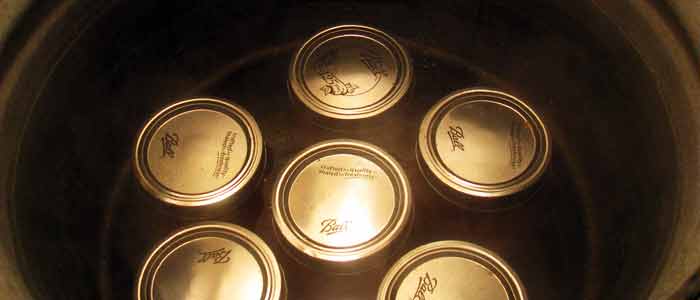
He had done a trial run on his own, so he got us prepped on our stations. He would complete the first step, the sanitizing of the jars, lids and rings, which is really important so that bacteria doesn’t contaminate the food you’re trying to preserve. To do this, he placed the jars in the water bath canner (which was filled with water) and brought it to a boil. I should note too that we didn’t actually go out and buy a water bath canner. Instead, we used my dad’s big aluminum tamale steamer, which fit about six jars in it. It worked like a charm. This is where the jar lifter comes into play too, as the water’s far too hot to stick your hand it and grab the jars out. Once he pulled them all out, we set them aside until they were ready to be filled. He washed the lids and rings with hot water and soap and put them aside as well.
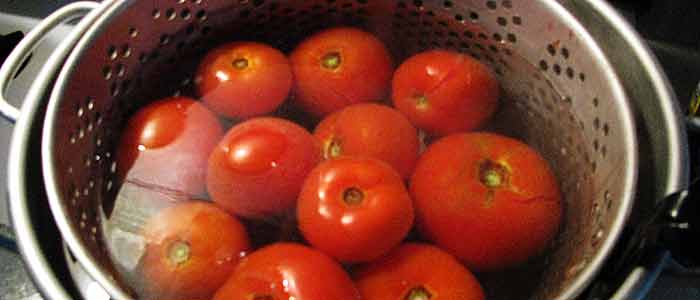
My job was next on the line. I was in charge of cleaning the tomatoes, and prepping them for the jar. I gave them all a cold rinse under the faucet and pulled all of their stems off. Then it was off to a boiling bath for my beautiful Big Boys. I placed them inside of the straining piece of my dad’s pressure cooker and placed that into the big pot. That sat in the boiling water until the tomatoes’ skin started to crack. I then pulled them out and plunged them into the bowl of ice water. This made it super easy for me to peel the skin right off the tomato. Once I cut away the tough part near the stem, and cut the tomatoes into quarters, they moved on to my husband Josh’s part of the assembly line.

Josh was on fill and seal duty, or what he might call the most important job of all. He filled the jars with the pieces of tomato, added two tablespoons of lemon juice and a bit of salt to each jar and filled them about a 1/2 inch from the top with the boiling water from the big pot. Then he had to use the end of a plastic spoon to slide around the perimeter of the jar and get any trapped air bubbles out. Once the jars were bubble free, he placed the lid on top, tightened the ring and onward the jars went to their final stage, back in water bath canner/tamale steamer for about 40 minutes.

As my husband and I took care of the tomatoes, my brother Mike was on a solo pepper mission. My dad entrusted him with the responsibility of not only washing and cutting the peppers, but finding the perfect recipe for the jars. The steps of canning peppers are essentially the same as they are for tomatoes, except you can change up the taste of what you’ve canned depending on whether you want the peppers sweet or hot. Since my dad, brother and husband are in constant competition over who can eat the hottest stuff, he stuck to mostly hot pepper recipes. In fact, I think Mike admitted to dumping the seeds of several peppers in one jar to give it that extra so-hot-it’s-inedible oomph.
The other big difference with canning peppers is the smell, since you have to boil vinegar to put into the jars instead of water like you do with tomatoes. So as Mike was washing and cutting up peppers, my dad was outside boiling the vinegar concoction with his outdoor gas burner in an effort to avoid the wrath of Mom. Once they filled the jars up with peppers and vinegar, they sealed them up with the lids and rings outside and them brought them in to be boiled the same way the tomatoes had.
All in all, it was a fun little Sunday project. And a messy one, as my mom can attest. You definitely need a few good hours set aside to take on canning and clean-up, but hopefully come December when I’m eating fresh-from-the-garden tomato sauce it will be well worth the time and effort.
This is really cool! I’ve always wondered how intensive the canning process is- thanks, Melissa! Now that you’ve tried it out, maybe I can handle it too. Fresh veggies in the middle of middle does sound pretty awesome 🙂